Last month, I began a series on delivering a high-quality home theater experience through custom installation. In that first installment, I talked about how to sell the home theater experience to potential clients. This time around Im going to talk about setting up a home theater to achieve the optimal listening and viewing experience. If youve heard it before, skim through as a refresher. If what follows is Greek to you, dont panic. Youre in the same boat as a number of your fellow custom installers. Look at this as an opportunity to improve your business and workmanship.
Shape of the room
Begin first with the basics of room dimensions. Low-frequency resonances often develop inside the rooms boundaries and completely destroy bass quality. Theres no magic room dimension ratio that eliminates resonances, but you can make sure that none of the resonant frequencies from the three dimensions (length, width, height) coincide. Many programs have been written to calculate resonances and predict overlaps; quite a few are available to download online. Ultimate AV (www.ultimateavmag.com/news/10388/index.html) offers a free program, and its pretty decent. However, I am not taking responsibility for any results that you get.
Controlling room reflections
The next stop is to soundproof the room. Sound Transmission Class is generally used to measure the soundproof-ness of a room boundary. STC isnt perfect because it ignores frequency extremes, but it is still useful. Your Mr. Universe target should be STC 80 for walls, floors, and ceilings and STC 55 for doors and windows. Thats hard to get (think one-foot thick walls consisting of many layers), and you may not be able to do it every time. To get started, look through the diagrams and STC ratings on Kinetics Noise Controls website (www.kineticsnoise.com/arch/tests/table.html).
Next up is noise control. As a general rule, anythingno matter how indispensable it may seemthat makes noise in the room should be removed. The kicker is usually HVAC, which is useless unless it dumps into the room. Companies like Kinetics and others manufacturer gadgets to silence HVAC, so start Googling.
The final part of aural design is acoustical treatment. When sound leaves the speakers, it reflects between the walls, floor, and ceiling. While some amount of reflected sound is good and necessary, too much of it ruins the aural experience. You want to do two things. First, reduce the total amount of reflected sound, or the reflection decay time as its called by acousticians. Second, acoustically treat any hard surfaces that fire discrete reflections directly from the speakers to the listeners. Start by predicting a target reflection decay time for the size of the room, and then calculate the amount of absorption needed to get there. Unfortunately, I know of no simple, commercially available program to help you with this; you will need to do the math.
Alternatively, you can fall back on the following rule of thumb. The rooms surfaces should be about 25 percent absorptive, 20-25 percent diffusive, and the rest reflective. Remember to spread the acoustic treatments around the room. Dont let all of one thing collect in one area. Low-frequency absorption of some description is good, too. Suffice it to say that springy, resilient, soundproof walls often work nicely as low-frequency absorbers. The next part, treating discrete reflections, is a little harder. During design, you can use a ray-tracing program like Ulysses (www.ifbcon.de/software/ulysses/e.php) to predict where all the discrete reflections will hit off the rooms surfaces, but its almost easier to wait until the room is built and search for the reflection points using a flashlight or laser pointer and a mirror. Whichever approach you take, make sure that acoustic treatments, whether absorbers or diffusers, occupy those reflection points.
Visual factors to consider
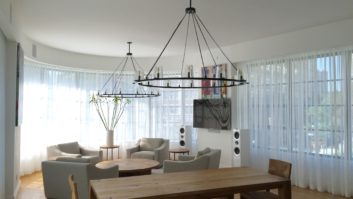
With aural design behind you, you can move on to visual design. Its best to start with room dimensions again. Ideally, everyone should have a view of the screen that is about 35-40 degrees wide (angle formed by the left edge of the screen, the viewers head, and the right edge of the screen). If the room is long and skinny like a hall, people in the front row will have a super-wide viewing angle, while folks in the back will be staring down a really narrow one. So, you want the room to be square-ish, but not absolutely square, which is bad for low-frequency resonances. Hand-in-hand with dimensioning is screen size and location. Be absolutely sure that everyone has unobstructed sight lines to the entire screen and that no one is looking up more than 15 degrees to the screen center. Also avoid any seats that are past 15 degrees laterally off center of the screen.
Ambient light control or lightproofing comes next. This is pretty simple. If you can see your hand in front of your face, theres too much ambient light. Doors and windows account for most light leakage, so avoid them as much as possible.
You do need some lighting in the room, though, which brings me to lighting design. Lights that shine on the screen are always bad, so go for small task lighting that is focused specifically on things like the viewers chairs and steps. One thing you might easily overlook is the color temperature of the room lighting. Both the screen and the room lighting should be D65, otherwise it will skew the viewers perception of the color temperature of the image on screen. There are some D65 lights available, but you can always use color filters with standard lighting fixtures.
Finally, you should campaign very hard for flat, dark, neutral colors in the room. A glossy, bright color will throw light reflections back on the screen and tint it that color. Gray and black are ideal for a home theater, but interior designers will rarely go along with them. So, go as dark and flat as you can. Just like with sound, its especially important to avoid even small reflective patches if they throw a direct light reflection from the screen back at a viewerthings like shiny metal trim or the glass top of a coffee table.
Now you know how to sell and design the home theater experience, but these are only half the pieces in the puzzle. The next column will cover how to select the right gear and install the home theater experience.
Anthony Grimani (agrimani@ pmiltd.com) is president of Performance Media Industries, a California-based acoustical engineering firm specializing in home theater design and calibration.