Calibration…the final frontier. To go boldly where few other custom installers have ever gone before. To make the difference between merely loud surround sound and sublime sonic delight.
Obviously, any home theater system needs to be calibrated, but do you really know all the steps involved in this final process? Most people think that calibration consists of setting the levels of the A/V controller and maybe also the delay times and speaker configuration selections. In fact, there are many other steps involved in the full-on tuning of a system. Skip any one of them and you may be sacrificing performance.
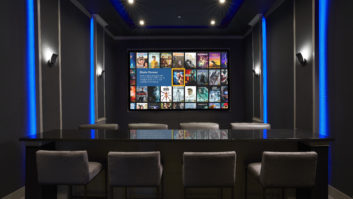
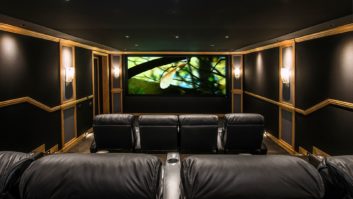
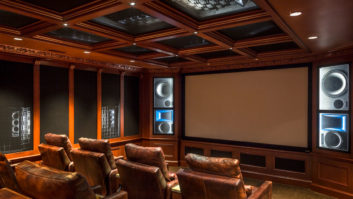
It all starts with understanding the end goal. A properly calibrated home theater audio system will accurately replicate the soundtrack character as intended by the film sound designer and director. Dialog levels, effects ratios, music tonalities, sound field spaciousness and localization will all match what the film creators heard while they were dialing in the soundtrack back in the studio mixing stage. Achieving the goal is a long journey through a sequence of operations that includes system configuration, verification and debugging, calibration, equalization and documentation. Listening tests must accompany each step to verify that what you are measuring actually sounds right and to allow you to develop a feel for the system.
The first step is an initial listening test. Pop in a few CDs and DVDs of known material and get a sense for the overall performance of the system. It probably sounds all wrong at this point as nothing has been configured or tuned, but never mind that. You will commence the process of connecting with the system. Write down your initial impressions on a form, as you will be referring to these along the way.
The configuration of the systems devices follows. Of course, the A/V controller has many settings that you will need to navigate through. On better products, these are all neatly laid out in a set-up menu, so that all you have to do is follow the steps. Even though its probably against your principles, I do recommend reading the manual, since the menu screens on most products dont allow enough room for detail. Then remember that DVD players, satellite receivers, gaming consoles and many other source devices also have multiple configuration settings. A DVD-A/SACD-compatible player will have substantial selections, and I have seen confusing language used in their menus. Again, read the manuals even though the potential for further confusion definitely exists.
Power amps, equalizers, speakers, and subwoofers all potentially have configuration settings, and now is the time to address them. Of course, you should record all of the settings on a report form so that you can easily recall them should you have to replace or re-install a device in the future.
Once everything is configured, it is time to verify that all the devices actually work as intended. Dont think that a configuration actually took just because you selected it. I have seen defective microprocessor code in A/V controllers result in the wrong outcome, despite what the menu choice stated. Of course, I have also seen products that are broken, either because of manufacturing defects or because of shipping abuse.
You are the one who has to find all of these errors and fix them before going any further. This will take a whole battery of tests performed using electronics, acoustic test equipment, and a very thorough procedure. Performing the tests will also take the better part of a day for a typical high-performance system. Do note that after calibrating about 150 systems, I have yet to work on one that had no defects at all.
Just the other day I was up against a system where the speaker wire gauge was way too thin due to an error in the specification documents. Despite the fact that the wiring was concealed in conduits, chases and plenums, I was able to test for the performance response and detect the mistake. That system would have sounded harsh and had poor bass response; no amount of tweaking could have helped. Coincidentally, the same system also had two speakers with internally reversed polarity. They must have been built up on a Friday evening before a long weekend, and someone wasnt paying attention.
Again, you are the last line of defense, and you need to detect the flaws before your customer does. It took a special polarity pulse-testing device (a $350 gizmo) to find the internal polarity error, but it saved what would have been hours of head scratching during the tuning process.
Now that you know every single device is performing as expected and that you have documented the results by recording the response charts and data, you can move on to the basic calibration steps. These consist of setting the individual channel delay times and levels of the A/V controller. For the latter step, I recommend using a good sound level meter and a reputable test DVD. Some controllers actually have erroneous internal test tones, so dont rely strictly on them. The Avia DVD and the PMI/Gold Line 5.1 Audio Toolkit DVD are both good choices.
Part of the tuning process may consist of finding optimized locations for speakers and subwoofers. Acoustic measurement gear and your ears will come in handy here. If the bass sounds smooth and measures smooth, chances are it really is smooth. One thing that no test gear can measure yet is the quality of the sound stage in two-channel mode. The phantom center images should be clear, and the wide spatial cues should be well resolved. Your ear will have to do the work here. If the speaker locations were locked down during design, youre stuck with the results. Baffle-mounting the speakers and setting their locations through computer-calculated optimization can get you close to ideal placement, so this is a good solution for engineered systems. You may also consider fine-tuning acoustical treatment locations, if aesthetics allow.
Any room wrapped around any speaker will interact with its sound propagation and alter its tonal balance. Correct for these room spectral effects by using carefully dialed-in equalization. I know that many of you are going to scream bloody murder here because you have experienced systems that sounded worse after the equalization process. Dont throw the baby out with the bath water, though. Poorly done measurement and EQ do result in terrible sound, but properly executed, the process of correcting for room-induced errors will yield fantastic results. It requires accurate measurement gear that supports averaging of multiple test microphone locations and resolves fine slices of frequencies. It also takes gear that can store and recall measurements as you progress through the correction steps.
The equalizer device itself needs to be of sufficient performance quality to avoid affecting the signal path. It also needs sufficient correction resolution to dial right into the problem areas and fix them. Ultimately, you need to develop the skills necessary to play the dialing game. This is a salable skill that separates you from the masses and justifies the custom nature of your business.
Once you have completed the equalization process, it is time to correct any level changes induced by the correction, then listen very carefully. Listen to many cuts of many musical and film styles. Compare what you hear now with what you wrote down during the initial listening test. You may find that you want to fine-tune the levels or the equalization settings. Thats just fine because by now you have spent so much time listening to this system that your senses are fully connected to it. You can safely do some small subjective corrections until you are happy with the results.
The calibration process is only over once you have documented every result and setting. Ideally, you will submit a full report to your customer and keep a copy in your files for future reference, a service call or system verification.
By now you have spent two days living with the system, and your client wants you out of there so that he or she can play. Go home; youve earned the respect of your customer, and you owe yourself a good dinner.
Anthony Grimani ([email protected]) is president of Performance Media Industries, a California-based acoustical engineering firm specializing in home theater design and calibration.