ThinkStock Image
Over the last several years I have spent a lot of time and effort learning about networking. Ten years ago when I founded The Source Home Theater, I didn’t care about the network; there was no streaming content to speak of and the URC Complete Control remotes I was installing were not “network aware.” But since then we have progressed from working with ISP routers, to putting them in bridge mode, and installing Apple Airport Extremes, to moving on to enterprise-grade solutions from Pakedge. Now that we are deeply involved as a Crestron dealer, nothing is more important to us than the network. It is the foundation of everything we do. I have been working with our partner integration firms to get them up to speed on not only the benefits of enterprise-grade networks, but on how to sell, specify, and configure them.
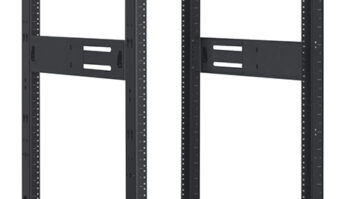
Recently Pakedge has made that proposition a little bit easier with the introduction of the SX-Series of managed switches. Setting up a basic network with Pakedge was already pretty straight forward with its RE-2 router and WK-1 WAPs. They both have very user-friendly GUI’s and are easy to configure. Combined they provide benefits to the client in a stronger and more reliable Wi-Fi signal and the dealer with better margins than consumer-grade gear and an easy to configure VPN that allows remote support and troubleshooting.
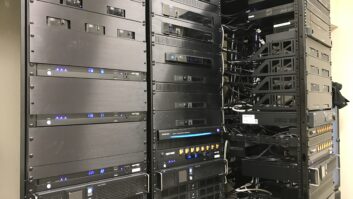
But the big guns of a network are the managed switches, and they have always been a challenge to set up. Take as an example my partner, Mark Feinberg of Home Theater Advisors. Mark has targeted his business squarely at the middle market—those $5,000-$15,000 AV projects that cover a two- to four-bedroom apartment in New York City (doing business in NYC is much more expensive, especially with the limited hours during which buildings allow work—typically 9 a.m to 4:30 p.m.; high costs of parking; and long travel times due to traffic between projects) so “middle-market” has a whole different meaning! But I digress. Mark has been eager to learn more about enterprise-grade networks and installed one in his own home with a Pakedge RE-2, WK1, and older Pakedge switch. But the GUI for the switch was cumbersome and confusing. He was not comfortable with the set-up and felt the risks out-weighed the rewards in offering the solution to his clients. It was holding him back; he couldn’t sell more robust control and AV systems because he didn’t have the network to underpin it. While his business is focused on the “middle-market,” he passed up opportunities for larger, more profitable jobs because he didn’t feel comfortable with managed networks.
Last month Pakedge sent an SX-24P switch for Mark to test, replacing his older switch. The change in his attitude about managed switches has been dramatic. It’s funny, we all know intuitively the difference a GUI makes with our clients and how much more engaged they are with a control system that is easy and efficient to use. The same is true for the interface that we have with the products we install. Mark had the switch up and running in less than 30 minutes. It actually took him longer to pull out the old one and put in the new one than it did to configure the new one. He said that the interface was so intuitive that all he needed was the basic understanding of a network that he has (static IPs, the benefits of separating traffic on a network, etc.) and he as able to grasp what the interface was doing almost immediately. There is a wizard to help set up the VLAN and the ports that makes it so easy, he was done in 15 minutes.
First, you access the switch and log-in and click on VLAN:configuration on the main screen. You are shown a graphical representation of the switch. Black ports are inactive and white are active. Under each port is the VLAN it is assigned to.

Next, click the Start button under the Pakedge Zones Wizard to start configuring the VLANS, using the Pakedge recommended Zone configurations of Management, Voice, Audio/Video, Automation, Data, and Guest. Just click on the Zones you want in your network. Here we have Management, Audio/Video and Automation.
Click on next and assign ports to each of the VLANs just established. Click on the port so it is highlighted blue and then drag it to the VLAN (here we are assigning ports 15 and 16 to VLAN4.
Next we identify our “zone link” ports. These are the ports that have network aware devices. As the helpful note on the bottom of the screen says, “A Zone Link port is any port that will to connect to a router, managed switch, wireless access point, or other Pakedge zone/VLAN aware device. Ports selected that are already a part of another Pakedge Zone will be overridden as a Zone Link Port.” For those of you who are comfortable with managed switches, these are hybrid ports and the untagged and tagged ports are automatically assigned. In the example below, the router is on Port 1 and the WAP is on port 24. Note the dotted lines around Zone Link ports. If you want to add more ports, just click on them and drag them to the box at the bottom of the screen under “zone link” (for other WAPs or managed switches).
Click the “next” button (it was below the zone link box, but got cropped out) and you get a view of your switch, with all of the ports and which VLANs they are assigned to.
Click ‘confirm’ and your VLANs are configured.
Pretty much the only thing missing (and something I’m assured that Pakedge is working on) is the ability to label each port for what is connected to it for making future changes quicker, easier and more efficient.
Literally two weeks after installing this switch in his home, Mark felt comfortable enough to specify it into a client’s system. The client is a renowned surgeon and regularly downloads lengthy HD videos of surgeries to review at home. And he cut the cord his family’s entire entertainment repertoire, consisting of four TVs with streaming content, nine zones of Sonos audio, and one Blu-ray player—basically everything will be streaming, so a rock solid network was critical. He had the bones of the network configured in under an hour—not bad for his first time at the rodeo on a client site.
And to top it all off, he had some questions about the network and the Pakedge tech support team was rock solid in their support. The biggest issue was that the network crashed the first night he set it up when the client downloaded an 800mb surgical video. The report was that the download started out great, but slowed considerably, and then the network totally failed. Unfortunately Mark had not yet configured the IP power conditioner to automatically reboot with a network failure; he was going to do that from the office the next day but with the network down had to return to the home. A reboot of cable modem solved the problem, but it happened again the next day so Mark got in touch with Pakedge. He had his answer in less than 15 minutes (in fact it had been in a newsletter less than two months ago: the Arris Surfboard SB6183 has a known issue when interfacing with better than consumer-grade routers. The options were to throttle the router to 200mbps download or replace the modem.
Fortunately he had set up VPN access via the Pakedge RE-2 router. He was able to log in from home and apply the throttling configuration quickly and easily to prevent any more issues until he could get to the home and solve the bigger problem. Because the client was so dependent on streaming content and heavy downloads, Mark was reluctant to throttle the speed long-term (the client was paying for 300mbps) so he went out and purchased a new modem on his own dime and replaced it a few days later when he was going back to make some system tweaks.
Pakedge tech support also helped him solve some issues with devices communicating across VLANs (for those who aren’t as familiar—when assigning static IP addresses to a device on a VLAN, be sure the gateway and DNS in that device’s settings are also on the same VLAN—so if you put the IP power conditioner on 192.168.3.11, the gateway and DNS server should be 192.168.3.1, or the power conditioner will not be able to resolve its IP address and will only be able to be accessed from VLAN 3 (Mark had to physically plug his computer in a VLAN3 port on the switch so he’d be on VLAN3 to access the power conditioner and assign the right gateway and DNS addresses).
In short, the new Pakedge switches are incredibly easy to configure, removing a lot of the reluctance for those who are not as comfortable with managed switches. It is still critical, however, to practice first at home or on your showroom so that you aren’t practicing on your clients.