While integrators have been concerned about integrating and automating lighting control since, like, forever, shade control has become a more recent focus as new companies have entered the field and new installation options have become available. Of course, shades are great for not only letting light in and keeping out sunlight that can damage furniture, artwork, and flooring — they can also block unwanted heat from rooms, and provide much-needed privacy, especially at nighttime.
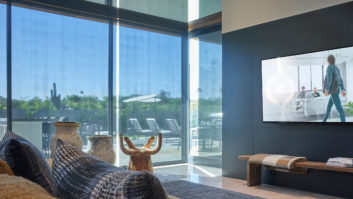
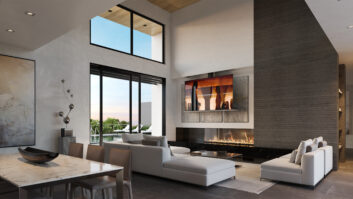
While I have a lot of cool tech in my home, it is the automated, motorized shades that always wow guests. (The 13-channel Dolby Atmos speaker system, three subwoofers, and projector hanging from the ceiling in our open family room more elicit looks of, “Oh, you poor thing…” to my wife.) I currently have a combination of Hunter Douglas (bedroom), Lutron (family room), and Crestron (dining room) motorized shades in different styles around my home, and when these all drop at sunset, that’s what grabs people’s attention.
“Wow! That is so cool! I didn’t even know you could do that! They just go up and down on their own? How does that even work?!”
Motorized shades don’t require a lot of exposition to get people to understand the lifestyle benefits. Literally every home has shades — often many of them — and every homeowner knows the chore of walking around and raising them in the morning, lowering them when the sun hits that one point and it is too hot/bright, then dropping them at night. So, the idea that this could all be taken care of without lifting a finger practically sells itself.
When my daughter, Audrey, was born, we built a new room onto our home to be my AV test lab. This room gets a fair bit of use with the different gear I’m reviewing, and has five windows in it. After the build, I needed some form of window coverings in the space, so I purchased some basic cell shades from Lowe’s that were cut kinda to fit and that mostly worked, but they were really janky to raise and lower and really didn’t look all that nice.
So, when PowerShades reached out to talk about reviewing their true PoE shades, I was immediately all-in. I’ve spoken to the PowerShades folks at CEDIAs in the past, had taken the dealer portal walk-through, and had seen some of their unique offerings, and this seemed like the perfect time to give the company a deep-dive and put their shades to the test.
Pre-Installation
Motorized shades all require power in some form, and PowerShades offers multiple options for a variety of solutions. If you are able to get to the home during construction, then all options are on the table, and one of PowerShades’ wired options uses a traditional two-conductor wire that can carry 12 volts and go back to the power panels, which can drive 9 or 18 shades. But another option unique to PowerShades is its TruePoE motors that pull less than 5 watts per shade and operate via a single Cat cable. (Some other companies offer PoE shades, but they are not true PoE and require the use of injectors or translators to work.)
The major benefit with PoE is that Cat cabling is inexpensive, readily available, and easy to pull and terminate. And since you’re already pulling tons of it on a jobsite, pulling some to windows doesn’t necessitate stocking a different wire. Further, since it carries control along with power, there are no communications issues or repeaters required. It also lets you easily and affordably add power via a PoE switch that can be placed virtually anywhere you can tie into the home’s network.
Of course, retrofitting wiring to windows after the fact can be tricky because of the way windows are framed and headered, which is why battery-powered solutions have opened-up so many great options for our channel. There are two schools of thought on battery power: use traditional AA or D-cell batteries or go with a rechargeable lithium-ion solution. The benefit of regular batteries is they are easily replaceable, don’t require recharging, and typically last longer between a battery change/charge. The drawback is you need to keep a drawer full of batteries on hand when the shade inevitably dies so you can change them out, plus the continued dump into the landfill.
For their battery-powered version, PowerShades went the rechargeable route, but with a different approach than Hunter Douglas, which uses an external, detachable battery wand. I loved that the HD wand could be easily removed to take to a charger (that can charge two batteries simultaneously), but I had difficulty concealing the battery pack and wire in my outside mount install. PowerShades batteries are located internally inside the roller tube, so they aren’t visible at all, and don’t require concealing. Aesthetically, PowerShades makes for a cleaner finished look for my install.
The company says batteries should last six-to-eight months between charges, and charging requires connecting a standard USB charger to the side of the shade for about four-to-six hours. My shades have only been installed for three months as I write this, so I haven’t had to charge them yet. In fact, with a single up/down cycle per day, I still have nearly as much battery life as I started with when I pulled them out of the box.
Along with its battery offerings, PowerShades also offers a solar charging option that helps extend the battery life in-between charges. The optional solar charger plugs into the shade’s USB charging port and then has a small (16 wide x 2-inch high) solar panel you adhere to a window with included high-bond tape that is concealed behind the shade. PowerShades recommends three hours of daily direct sunlight for consistent performance.
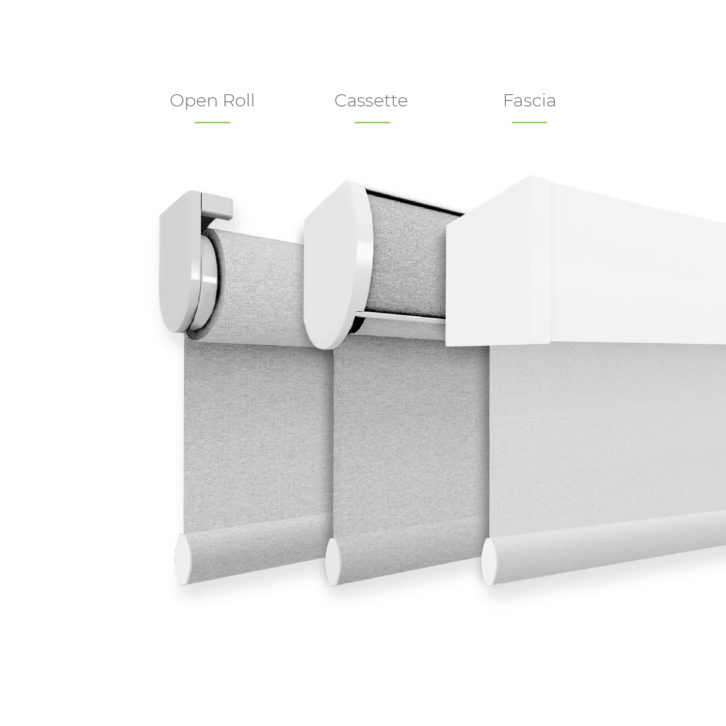
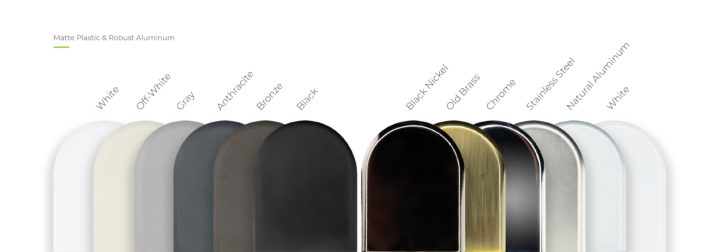
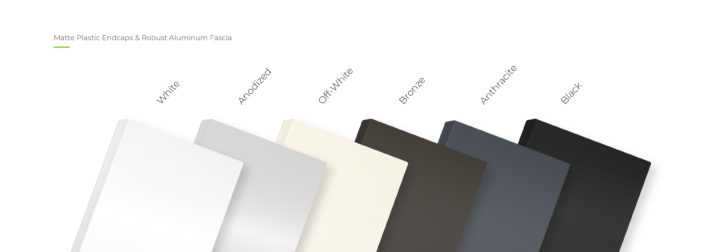
In addition to choosing how you’ll power the shades, PowerShades has three styles, including Cassette Series, Fascia Series, and Open Roll Series, as well as a variety of colors and finishes for end-caps and hembar options. PowerShades also offers dual-roller shades — perfect for sheer shades during the day and blackouts at night — coupled shades, and outdoor shades that are perfect for keeping bugs and leaves out of exterior entertainment spaces.
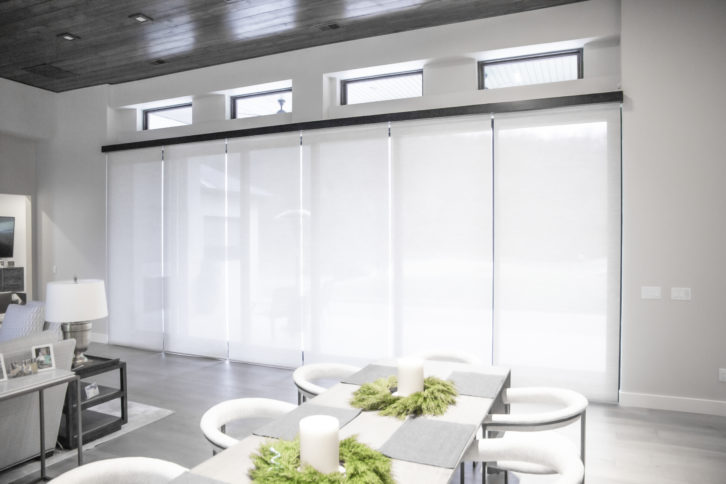
My windows required outside mounting, so I went with the Fascia Series that includes a robust aluminum fascia, and has a nice, clean, and finished look, concealing the roller. For an inside mount, I would have opted for the Open Roll Series, which has a sleek, cool style.
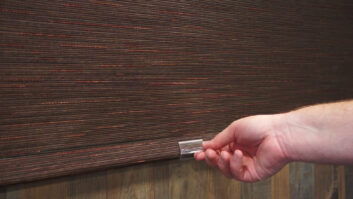
While PowerShades doesn’t offer as many fabric selections as Lutron or Hunter Douglas, they had plenty enough for me and likely most of your customers, and part of the opening dealer packet is a book full of fabric and end-cap samples. You can also browse the 69-page online Interior Digital Fabric Book to see the options, as well as get information about the fabrics’ openness, UV blockage, available roll widths, and more. Shades can be ordered in sizes up to 20 feet wide or high, and can be railroaded depending on fabric selection.
All ordering and configuring is done via the dealer website portal, which is intuitively laid out and easy to navigate. The site also includes a lot of helpful information such as installation guides, videos, look books, marketing materials, integration partner driver downloads, and more, including a walkthrough on how to actually use the portal.
Installation
Because my room was an add-on, I had pictures of the wall construction and knew where I could get access, so I wired three shades with Cat6 for PoE and went with battery-powered shades for the other two, one with solar. My windows all necessitated using “outside mount” shades, and being able to choose which side the shade wiring will connect to when ordering meant I was able to order the motor on the side I could retro to, which was nice.
With two of my windows facing southwest and getting loads of afternoon sun, my thought was that the solar charger would be enough to provide all the power needed. However, PowerShades says the solar charger doesn’t actually deliver enough power to fully charge the shade, but rather provides enough to extend the battery life by up to a month or so. For comparison, three months after installation, my non-solar-powered battery shade has 7.9 watts of power remaining, and my solar-powered shade has 8.1 watts.
For the other three PoE shades, I used Luxul’s new SW-100-04P PoE+ switch that was tiny enough to wall-mount into a closet where it was easy to access the attic space and tie into the rest of my home’s network. This made for a very simple and clean way to power these shades. I could definitely see either running all shades back to a rack and using a large PoE switch, or using several smaller PoE switches scattered about to power groups of shades depending on the project size and construction.
The shade installation is pretty straightforward using the included wall/ceiling mount brackets, and there is a handy Web doc and video on the installation process. It’s recommended you “dry fit” them before installing, then you can take all your measurements, make sure everything will be square and level, and mark pilot holes. Since I was trying to mount the shade right above the trim of my window, I had a bit of difficulty getting the sides of the shade to lock into the brackets, but after some quality finagling and swearing, I got them all locked in.
For the PoE shades, at this point you would just plug them in and then proceed to configuring, as they would then be on the network, powered, and ready to go. But the battery/solar shades require a little more work if you want to be able to tie them into third-party control systems, put them in schedules, or use them with the PowerShades app.
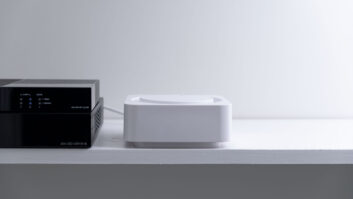
First, you need PowerShades’ RF Gateway, which is a small, black box that hardwires into your network and allows these shades to have cloud-based connectivity. (One RF Gateway can support up to 30 shades.) You also need an RF remote control to link the shades to the gateway and perform initial setup like setting set shade limits. Then you link the feedback of the RF Gateway to the rest of the project. This might sound like a lot, but, in reality, the whole process took about five minutes once I knew what I was doing, and when finished all of the shades appear within the main dashboard and app and can be controlled, grouped together, put into scenes, etc.
Configuring the shades — naming them, performing firmware updates of the PoE models, setting their direction, putting them into groups, and setting up automations — is done via the PowerShades Property Dashboard, and this is also where you, the dealer, will have access to your projects and be able to give your customers access to their own homes so they can go in and tweak and make adjustments.
The Dashboard is divided into four sections: Dashboard, Devices, Automate, and Admin. Dashboard gives you an overview of every shade’s current status — its type (RF or PoE), its current level in percent, its current battery level, and the Rx signal for RF shades. It also shows you what schedules, scenes, and groups each shade is part of, as well as its location in the home. A gear wheel lets you access each shade to raise/lower it and set limits for the PoE shades.
Devices lets you make changes to the shade’s name, set the direction its facing, and list the floor, room, and window location, along with other custom attributes you might want to add. Admin is where you manage who has access to the shades and what their permissions are.
Automate is where the actual “programming” is performed, and it is a logical three-step process divided into Groups, Scenes, and Schedules. Groups lets you combine shades together, either in the same room, or across an entire project. Adding a Group brings up a simple window to give the group a name, and then checkmark which shades in the project will be in that group. Scenes is where you tell a Group of shades to go to a specific position. For example, I have a “Morning Pool” scene that tells all shades in the Pool Windows group to go to 55 percent. Schedules sets when a Scene will trigger, and you get a bunch of options to configure this. For example, you can select which months the schedule will apply, which days of the week it applies, and then what time of day it applies, such as a specific time, and at/before/after sunrise/sunset.
Another cool option is to trigger an event to happen around solar noon. While this doesn’t have the sun-tracking feature of Lutron’s Hyperion, it would allow you to program shades to adjust to the sun based on the window direction, which is certainly another handy tool to have at your disposal.
All told, the Dashboard simplifies the process of creating Automations for your customer, or teaching them how to create their own.
In Use
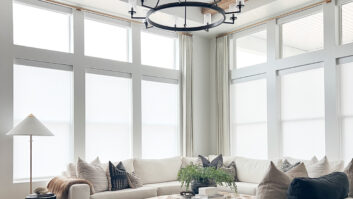
In this room — with two windows facing a swimming pool in our backyard and two facing the street — I was looking for privacy, but not for blackout, as there are a lot of times where I am in there working and want the shades down or halfway and don’t want to sit in a blacked-out room. I selected a fabric with 5 percent openness, which I thought would provide a good measure of light and privacy, but they are a lot more sheer than I had anticipated, especially at night, when you can see into the room if the light or TV is on a good bit more than I would like. In retrospect, I would have selected a 3 percent openness fabric. Certainly nothing against PowerShades, but more a caution of making sure the fabric you select works in both day and night.
As mentioned at the outset, I already have a lot of shades in my home, and other than the dining room — which my wife manually raises/lowers when she is in there, depending on the sun’s position — I almost never manually control the shades, but rather have the automated scene triggering take care of adjustments based on sunrise/sunset. And in this regard, the PowerShades functioned perfectly, firing off the programmed automations regularly throughout the day.
When I wanted to control the shades, I turned to the PowerShades app, which works remotely, letting you access and control your shades from anywhere. When you open the app, it displays all of the shade Groups previously created, and you can adjust the Groups with open/stop/close commands. You can then see each individual shade to adjust it, or drill into the shade to see its current position and its battery level.
Unfortunately, the app currently doesn’t allow for things like scene creation, editing, or execution. PowerShades says these features are in the works for a future software update, but there is no current ETA.
In operation, the PoE shades are much faster than the battery shades; taking the PoE shades about 18 seconds to fully open/close compared to 37 seconds for the battery shades. I also found them to be acceptably quiet in operation; not as silent as my Lutron or Crestron shades, but just a tick louder and certainly never bothersome even with all five moving simultaneously.
PowerShades integrates with a host of third-party control systems, including Control4, Crestron, ELAN, RTI, Savant, and URC, as well as offering voice control via Amazon and Google. Integrating with my Control4 system was a snap, simply requiring adding the drivers for the RF Gateway, RF Shade, and PoE Shades. Once the drivers were added, I entered the IP info for the Gateway and the PoE Shades, named the shades, and then could add them to any programming. You’ll want to be sure to give these devices a reserved IP address in your router so the communication doesn’t get broken in any kind of reboot.
I preferred controlling the shades with the Control4 app because I found it more precise and quicker to slide shades to the desired level, as well as being able to trigger scenes.
Motorized window shading is one of the fastest-growing segments in our channel, and PowerShades ability to drive shades from PoE or battery offers a lot of installation opportunities, as does its integration with a wide array of control companies. For dealers looking to learn more, you can request a consultation via PowerShades’ website.
https://www.PowerShades.com; 417-553-0504
Kudos: PoE power opens a ton of install options; plenty of fabric and style choices; finished install looks great; Dashboard simplifies automation steps
Concerns: App control not fully developed
Product Specs:
- Custom shades available in a host of fabrics and sizes
- Offers three different looks: Open Roll Series, Fascia Series, and Cassette Series in a variety of finishes
- Shades can be powered via battery, AC, DC, or PoE with an optional solar charger to extend battery life
- RF Gateway and RF remote required for configuring non-PoE shades and adding to cloud-based services
- PowerShades app available for iOS and Android offers remote access/control
- Supports third-party integration with Control4, Crestron, ELAN, RTI, Savant, and URC; Voice control via Amazon Alexa and Google Assistant