If this course does nothing else, hopefully it will once and for all keep anyone from saying “rooter” instead of “router.” (I’m looking at you, dad!) As course 2 covered the wide world of switches, course 3 focuses on the router. While I was under the misunderstanding that a network needed a router to function, it turns out that’s not true. In fact you can have a fully functioning LAN without a router. Before you skip this course entirely and run back to switch-land, it’s when you want to get off your network and out to other networks — like the Wide Area Network of the internet — where your router game needs to be on fleek. It’s all about the WAN, man!

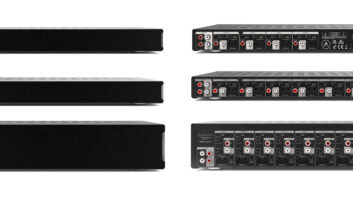
Course 3 covers LAN and WAN interfaces, IP address planning, network troubleshooting, and security and remote access. There is a lot of “hands on” with the included RK-1 router where you learn to navigate its menu structure. The RK-1 is a solid bit of kit, with near Gigabit pass-thru and including dual WAN ports for redundancy and increased reliability.
Every properly connected device on the network knows the address — default gateway — of the router, and the router assigns configuration info to all devices on the network using DHCP, a process described as declaring the network. And it should go without saying, but you should only have one router in a system, as having multiple devices declaring the network will bring bad mojo to your network.
When you request a website — say my craftbeer review blog at sciaccadrinks.blogspot.com as a totally random example — the DNS server in the router gets the unique address for that site and begins routing your computer there. The class showed how to use the trace route command in both the CMD prompt and within the router so you can see how many network hops and how much time the request takes.
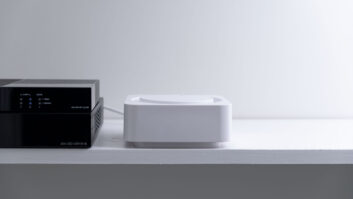
Much like a high-performance audio system separates components into multiple parts that focus on one task, a superior network is designed in a similar manner; the modem is just a modem, the router just a router, the switches are just switches, and the Wi-Fi handled by WAPs. If you’ve spent any time working with a modem/router/switch/Wi-Fi device provided by the cable company then you’ll appreciate the “craptastic” description that the course offers for such a mashup. For best results, replace that whole nightmare with something better, but if you have to use the ISP provided modem, you’ll want to turn-off WiFi broadcasting and put the device into Bridge mode which disables its routing and turns it into just a modem.
The plan the LAN workflow was one of the most practical parts of this course. This breaks network design into four steps: 1) sizing the network by estimating the maximum number of connected devices (hosts), 2) selecting the network address, 3) assigning both wired and wireless addresses, and 4) configuring hosts to match your plan.
This revisits concepts learned in the first course, namely employing the correct subnet mask to handle networks of 254, 510, 1022, or more devices. While taking the course, I happened to be at my daughter’s school and saw that the wireless access had a subnet of 255.255.248.0, and it was very cool to understand exactly what that meant regarding simultaneous users on the network. #Knowledge
“But, why not just allow for the maximum number or devices on every network?!” I wondered. Because this eats up network management resources as the management system tries to reach out to potentially thousands of unnecessary addresses. This means sizing the network to accommodate the maximum number of simultaneous connections while not creating hundreds or even thousands of unnecessary devices is important. Getting sizing wrong up front can lead to lots of additional work and troubleshooting down the road.
The other really useful concept covered was the difference between static, dynamic, and reserved network addressing. Like many of you, I was in the habit of setting up all devices requiring unchanging IP addresses — controllers, media servers, etc. — with static IP addresses. While there is nothing wrong with this, it takes extra work, is prone to human error, and can cause real issues if you need to make a major network change. The class explained why using reserved addresses offers the best of both worlds, and I learned to quickly add reserved addresses to devices, renew lease times, and more, and this will be my new go to for network setup!
If you’ve ever been on a jobsite and hunted for an address or login, you’ll appreciate that good networks have good documentation. To facilitate this, there’s a handy “Plan the LAN” addressing guide where you can enter key information for each network. This can be left onsite or in the client’s file, making it easier for any follow up visits. It also makes it easier to add new devices to the network that fit within a logical range.
Also new to me was the section on how to and — more importantly — how not to set up remote access. Learning how to setup a VPN and use software like OpenVPN to remote access a client’s network can save truck rolls and allow you to potentially resolve a client’s problem far more quickly.
One of the frequently asked questions about the PCNA course is, “How much of the training is Pakedge-specific, versus universally applicable?” Or, put another way, “If I don’t use Pakedge gear, would I benefit from the class?” I’d say the vast majority of information from the first three classes is brand agnostic and would benefit anyone designing networks. Things like understanding subnet mask, reserved IP addresses, DNS lookup, and LAN management are universal and apply across all brands. The only parts that have been really specific to Pakedge have related to accessing the interfaces in the switch and router. Obviously, that the PCNA class includes Pakedge hardware will give anyone taking the class a lot of hands-on time with that gear, but the training should translate across any hardware.