Some people think that because I’m a reseller and installer of cellular signal boosters and have access to just about any brand and model of booster I want to try, that my home ends up being a test bed for new products. Nothing could be further from the truth. I am no longer in the phase of my life where I want my home to look “gadgety.” Rather, I am like most of you, probably. I want my home to incorporate technology, but I want it blend in and enhance my lifestyle, not be the focal point.
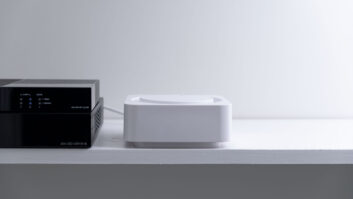
But I also just renovated my home. And like millions of people’s homes, it’s in an area where cellular reception is spotty. So I decided to use this as an opportunity to add a booster to improve service, and I decided to install the newest booster I could find: SureCall’s recently introduced Fusion5s residential booster.
Most of my company’s business is in the commercial arena, and SureCall has become our preferred brand for large installations. But we also do have the occasional need for residential boosters. And the Fusion5s, designed specifically for residential use, incorporates the same, patented, 5-band booster technology (2G/3G/4G for all carriers) found on all the SureCall 5-band boosters we use for commercial installations. It’s just designed to be more affordable for home use.
My big question was whether these cost-saving efforts would translate into performance shortcomings. So I decided that testing it in my 3,800-square-foot home would provide some answers.
We approached this installation as we would any other. We measured the signal strength inside and outside the house before we started. As you can see on the chart (Figure 1), the outside signal strength varied by carrier, frequency band, and direction from the house, but in most cases, the signals were strong enough to support service.
Inside the home, however, signal strength for all bands and all carriers fell to a point where making/receiving calls, texting, or connecting with the internet was next to impossible–especially for LTE service. The only exception was Sprint, which seemed to have a very usable signal.
A close up of the Fusion5s amplifier, which was connected to the “yagi” directional antenna inside the attic of the author’s house (pictured) So with adequate signal strength outside but poor coverage inside, this was setting up to be a perfect test bed.
In most booster installations, we prefer to mount an omnidirectional antenna on the roof to collect the signal coming from the nearest towers (and distribute the outgoing return signal). But when the installation crew arrived at my home, we realized we had a problem; we did not have a ladder long enough to reach my roof. So we switched gears and investigated installing the “outside” antenna in the attic. We found that mounting a directional antenna, referred to as a yagi, pointed toward the nearest cell tower seemed to offer a viable alternative. That was where we decided to mount it, even though it might impact where we mounted the system’s “inside” antennas, which we also wanted to locate in the attic. We thought we’d be able to work that out when we balanced the system later on.
Because we had a power outlet in the attic, we mounted the Fusion5s booster on some of the beams of the roof’s wood support structure and then connected it to the yagi with the coax cable included in the kit. We then set about locating the inside antennas.
Rather than mount a dome antenna on the ceiling inside the home’s living area where it would be visible, we decided to position two panel antennas in the attic placed face down under the insulation against the ceiling sheetrock. We chose two locations, each approximately 30 feet from the yagi antenna to reduce oscillation–or feedback–as much as possible. We positioned one panel above the kitchen area, while the other was placed about 20 feet away above my home office.
Figure 1: The reviewer measured the signal strength inside and outside the house before we started. The outside signal strength varied by carrier, frequency band, and direction from the house, but in most cases, the signals were strong enough to support service.
Mounting the entire system in the attic enabled us to make a perfectly clean, invisible, installation–inside and out. The question remained, though, if the booster would perform adequately. We then set out to balance the system using the dials and LED indicator lights on the booster, while also taking meter readings in the living area. In all, it took our crew about 15-20 minutes to balance the settings.
Using our signal strength meters, we saw significant improvement across all frequency bands and all carriers. In fact, the signal strength inside the home was not only better than before the installation, but it was stronger than the signal outside the home. And every frequency band showed a good to excellent strength level, delivering three to four bars across the board. It even supported LTE service, now.
The last step, of course, was to give it the real-world usage test. So we had four users simultaneously making calls and streaming music off a leading online service. And the system worked exactly as advertised.