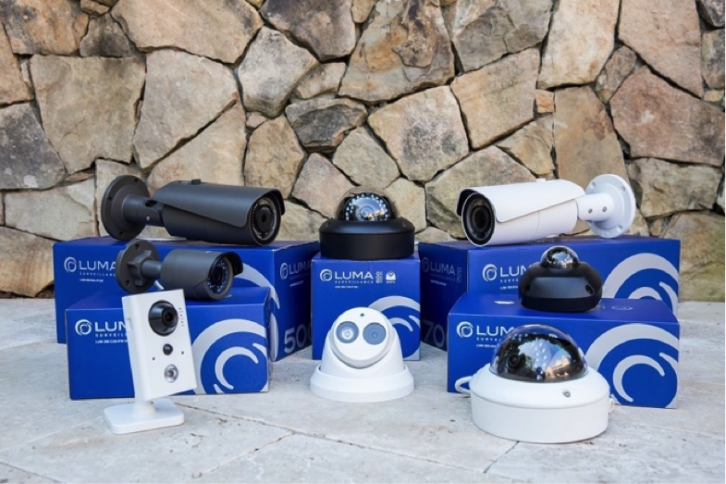
Our good friends at SnapAV wanted us to review their Luma surveillance cameras and give our unvarnished feedback. Since I do a decent amount of surveillance work, I asked Mark to help me out in the testing for a different perspective. His company works exclusively in NYC and most of his clients live in high-rise, doorman buildings that have little need for a true surveillance system (although some have inquired in the past to monitor kids and household staff). He therefore had never installed and configured a security camera, NVR, or DVR. He borrowed the Luma 510 Series NVR, Luma 310 Dome camera, and Luma 310 PTZ camera. I gave no assistance and asked him to set it up from scratch and help me with this review.
Related: Getting Secure in Security
To get started, he first glanced at the quick setup guide to see what the key steps were. He keeps extra ethernet and power cords plugged into his rack for testing, so he quickly connected the NVR directly to the Wattbox and network switch in the rack. The guide advised setting up the NVR first and updating the firmware before connecting the cameras to ensure the cameras update to the proper firmware version, so he temporarily left the cameras in the box.
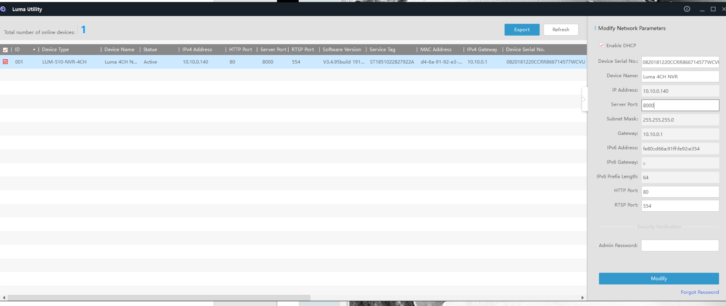
Setting up the NVR was a breeze — download the Luma Utility from the SnapAV website, it autodiscovers the NVR, and all you need to do is create a password to comply with California SB-327 requirements. You can either set a static IP address at that screen or set a DHCP reservation in your router. If you have OvrC Pro enabled on-site, the NVR is now in OvrC and you can update the firmware. This is where Mark ran into a small glitch; he tried to set everything up on the day OvrC was down. Updating the firmware through the web GUI of the NVR wasn’t working, so he broke the rules and connected the cameras anyway. Everything worked flawlessly.
By simply going to the IP address of the NVR and putting in the new login credentials, he had full PTZ control from the GUI, was able to view both cameras, and could set up a free Wirepath DDNS address to easily access the cameras remotely from any computer (PC or Mac). To make remote viewing even easier, LumaLink made setup a breeze ± download the Luma Surveillance app to an iOS or Android device and log in using OvrC credentials. Now with a quick app launch, he had full visibility and control of the cameras. The one issue that he ran into is that the ability to view the cameras in free browsers (i.e., Chrome, FireFox, Edge) is very new and was a bit spotty. Viewing in Internet Explorer and via the Luma app worked very well. Following the quick start guide, he set up a few port forwarding rules in his Araknis router and away he went. No other configurations required; everything just worked.
In the OvrC app, the NVR is accessible and if the cameras are connected to a network switch, their streams would be visible as well. Currently, with the cameras connected to the NVR, the streams are not viewable in OvrC — we assume because the NVR puts them on a different IP scheme than the rest of the network. We hope to see this rectified in the future. So at this time you can see that the cameras are connected and get some basic information like the name of the camera, whether it is connected or not, its IP and MAC addresses, and its resolution. All valuable information and something that should prove useful
From a very basic standpoint, he was good to go — full viewing capability at home or away via web browser and app. But he wanted more (don’t we all).
The first order of business was to maximize hard drive space. All recordings were changed to motion triggered, instead of continuous. Combined with the H.265 codec used (which is 40 percent more space efficient than H.264), recording-space anxiety is a thing of the past.
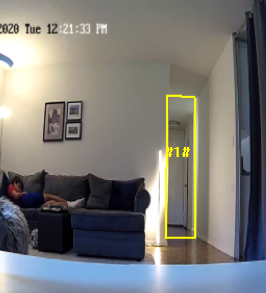
Since he shares his office entrance with his appointment-only showroom space, he wanted to know if someone went from the showroom into the office area. Using Smart Motion settings, he easily outlined the hallway leading to the office, so when anyone goes down that hall, he gets an alert during scheduled times of the day.
His last goal was to integrate the cameras and NVR with Control4. For that, all he had to do was install the drivers from the Control4 database for the NVR and each camera. He put in the IP address and the new password for the NVR, then configured the cameras using the NVR IP Address and the ports for the cameras (65001 for the camera attached first ethernet port on the NVR and 65002 for the camera in the second port). He refreshed navigators and then had the cameras integrated with Control4. SnapAV also has drivers for Crestron, RTI, and ELAN on the Luma support page.
Overall, we are impressed with the ease of set up and the myriad options available in configuration and tweaking the system. Mark now will do what he always does and use the system in his test environment for three to six months and then he will feel comfortable selling surveillance solutions to his clients, further broadening his offerings and increasing revenues and client satisfaction.
Pros:
- Easy setup, especially with OvrC
- Part of the OvrC ecosystem
- Wide range of cameras and options for NVRs
- Seamless integration with Control4 and presumable other control systems
Cons:
- Cameras not viewable in OvrC when connected to NVR (for now)
- Viewing in browsers other than IE and Safari is new and doesn’t always work well (seems to be better when in Incognito mode in Chrome, but still not 100 percent reliable)
For more information, visit https://www.snapav.com/shop/en/snapav/luma.
Want more stories like this delivered to your inbox every day? Then sign up for the free Residential Systems eNewsletter here.