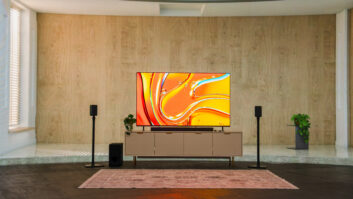
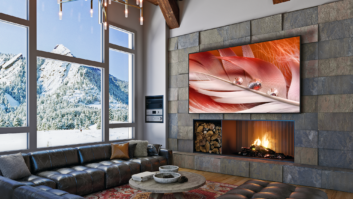
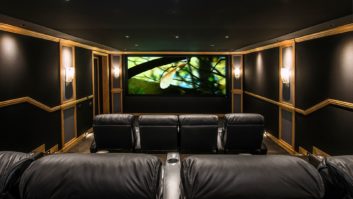
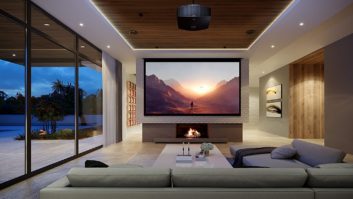
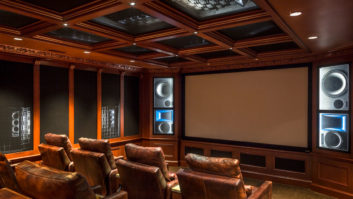
It makes good business sense for custom A/V dealers to offer video display calibration services to their clients. They expect you to provide custom solutions to increase the enjoyment of their entertainment investment. When you calibrate his or her video display to achieve the highest picture quality possible, you will be delivering maximum value on every client’s investment.
If you are just learning about video calibration, you may be unsure of what the calibration procedures are and how to perform them. This goal of this article is to bring you up to speed on what video display calibration is all about.
Video display manufacturers adjust their products to look as appealing as possible next to competing gear on a showroom floor. It’s been found that brightest sells best, so user controls and technician service controls are set for the highest apparent light output. The manufacturer often sets the white level too high and adjusts the background grayscale to be too blue. Then, to make the picture look acceptable, they introduce non-standard corrections to the picture. Scan velocity modulation (SVM), sharpness control and “red push” in the color decoder or color matrix are just a few of the cover-up measures to compensate for the resulting blooming, resolution loss and wrong picture background color. Furthermore, many displays have automatic color adjustment features and incorrectly calibrated automatic room light correction that further degrades the picture.
As you might guess, the end result is not the same high-quality video picture that the cinematographer and recording or broadcast engineer intended; at a recording or broadcast studio you would not see mis-calibrated video displays. All of these factors provide an opportunity for profitable field calibration, on all your clients’ high-quality displays.
To calibrate a video display, you will perform some or all of the following steps. You will accurately adjust the black level (brightness control), peak white level (contrast control), color saturation and hue. You will disable the sharpness enhancement circuit (no more shadow artifacts surrounding all the faces and text), the SVM circuit (fine detail won’t be all blurred together), the auto-color circuit and the room light sensor (auto-brightness, iris, etc.).
You will adjust the background grayscale color (white balance) to the industry standard white reference (D65) for which the overlaying colors are designed. If possible, you will adjust for accurate color decoder operation, with no red push (allows rich, normal saturation for all other colors). Plus, you will adjust the focus and geometry controls for optimum picture quality.
While calibration may sound complicated at first, once you have calibrated a few displays, it will seem like clockwork. It does help to have test equipment designed specifically to make every step of the calibration as easy as possible. The typical calibration steps are as follows:
1) Disable the room light sensor feature, preset the black level and preset the peak white level. This puts the video display into a normal operating range, so that all other controls can be adjusted properly.
2) Adjust the focus and geometry (picture size, centering, shape, CRT convergence), if necessary. Disable the sharpness correction, scan velocity modulation and auto-color.
3) Adjust the grayscale tracking; also called white balance.
4) Adjust the brightness, contrast, color, hue and sharpness presets for optimum picture quality. The control presets are adjusted so a client can do desired “tweaks” but return to calibrated settings by selecting a reset function. A preferred calibration may provide separately calibrated user selections for daytime and nighttime viewing.
5) Adjust the color decoder or color matrix for accurate operation. The adjustment will be possible for the NTSC and component video inputs only if color decoder controls are provided in the service menu.
More Detailed Procedures. Here is a more detailed calibration step procedure to help you gain a better understanding:
Black level setup: Brightness control is set to make the black parts of the picture dark without losing any of the darkest gray picture detail. A calibration product such as the Sencore VideoPro generator provides a special Pluge pattern that alternates a large, open rectangle between black and blacker-than-black video signal levels. This makes it very easy to precisely adjust the black level. First, set the user brightness control to its midrange position. Then, adjust the sub-brightness control in the service menu high enough to be able to see the alternation between black and blacker-than-black. Finally, adjust the sub-brightness back down, just to the point that you no longer see the difference between black and blacker-than-black.
Peak white level setup: The contrast control should be set to produce the highest white level possible, without degrading the picture. The contrast control is often set so high that the picture quality is severely degraded. To calibrate a display’s peak white level, first set the user contrast control to its maximum position. Then, adjust the sub-contrast control in the service menu for best picture quality. The user won’t be able to push the white level too high and impair the picture.
On CRT-type displays, excessive white level causes out of focus blooming, picture bending and yellowing of peak white parts of the picture (the blue phosphors run out of steam first). The VideoPro generator’s Needle pattern allows you to detect any of these picture impairments so you can adjust the sub-contrast control as high as possible, without degrading the picture.
On fixed-pixel displays, excessive white level causes the brightest gray detail to blend together with full white parts of the picture, called white compression. The VideoPro generator HiLoTrk pattern contains very bright gray boxes on a 100 percent white background, making it easy to detect white compression. Increase the sub-contrast control until you see the brightest gray box just start to blend into the background. Then, back off the control setting one or two steps to insure no white compression.
Grayscale tracking adjustment: You should calibrate the background “canvas” color of the display (what you see with the color disabled) to be the industry standard white reference (D65), so that all other colors are reproduced accurately when they are overlaid on the neutral background. This background color needs to be correct across the entire grayscale, from darkest gray to brightest white. Most displays provide two sets of color balance controls. These allow you to white balance the background at a fairly dark gray and at a medium-white gray. Once these two luminance levels are balanced perfectly, there should be very little color shift from the desired white reference at other luminance levels.
The three color controls used to balance the dark end of the grayscale are typically called cutoff controls. The three color controls used to balance the bright end of the grayscale are typically called drive controls. To adjust grayscale tracking, you will use a video generator, such as a Sencore VideoPro, that provides a centered white window with adjustable light levels (0-100 IRE). You will use a colorimeter, such as the Sencore CP5000 Color Analyzer, to measure the color balance of the light output and tell you how to adjust the red, green and blue cutoff and drive controls to balance the display’s light output to the standard white reference color.
White balance the dark end of the gray scale, with the cutoff controls, at a very low light level. This is important, because the human eye is most sensitive to grayscale color shift in the very darkest parts of the picture. Set your Window pattern to whatever IRE level produces about 0.25 foot-Lambert on the display you are calibrating. Adjust the red and blue cutoff controls to balance to the D65 standard white reference color, usually leaving the green cutoff control untouched, as your adjustment reference.
White balance the bright end of the gray scale, with the drive controls, at a medium-gray light level. Set your Window pattern to 75 IRE and adjust the red and blue drive controls to balance to the D65 standard white reference color. Repeat the cutoff and drive adjustments a couple of times, to minimize interaction between the two sets of controls.
Color and hue adjustments: First, set the user color and hue controls to their midrange positions. Then, adjust the sub-color and sub-hue controls in the service menu for proper color reproduction. Select the SMPTEBar color bar pattern and view the pattern through a blue filter. Adjust the sub-color control, in the service menu, to produce equal intensity in the adjacent white and blue sections of the test pattern. Adjust the sub-hue control, in the service menu, to produce equal intensity in the adjacent cyan and magenta sections of the test pattern.
Color decoder adjustment: The display’s color decoder is usually adjusted at the factory to over-emphasize red picture coloration, to somewhat compensate for the excessive showroom blue that they want in the background grayscale. After you calibrate the grayscale to the D65 industry standard, you should also adjust the color decoder back to accurate operation, if color decoder controls are provided in the service menu. After you adjust the user controls for accurate blue saturation and blue hue, adjust the color decoder controls for accurate red saturation and red hue, and green saturation and green hue. The VideoPro generators provide a special DecodAdj pattern that makes it easy to calibrate these color decoder controls.
Color decoder controls are often labeled R-YR (red saturation), R-YB (red hue), G-YR (green saturation) and G-YB (green hue). Some midrange Sony displays have an AXIS adjust, instead, that gives you four preset color decoder adjustment conditions. Simply choose the AXIS setting that yields the most accurate color decoder operation.
If color decoder controls aren’t available, you will have to compensate for the red push (over-saturated reds) by decreasing the user color saturation control somewhat, judging the effect on the faces on assorted program material. This, of course, de-saturates all the other picture colors as well, yielding duller looking pictures, making a good argument for calibrating the color decoder, if possible.
Custom field calibration of your clients’ expensive video displays is a business opportunity you can’t afford to ignore. Proper video calibration is relatively easy to perform, and the payback for both your client and yourself can be substantial.
Tom Schulte is an application engineer at Sencore Inc. (www.sencore.com).