Kudos: Product line feels modern, refreshed, and luxurious; tons of fabric and color options
Concerns: Limited keypad options; lacks advanced programming customization; Palladiom’s premium price; “delicate” battery ribbon cable
Lutron doesn’t make big changes often, and typically when the company does release a new product, it is around for a decade or more before seeing a major upgrade.
Case in point: Lutron introduced RadioRA back in 1997 — a year before I got into the custom installation business! At the time, it was the world’s first two-way radio frequency lighting control system, and it opened up a whole new world of automated lighting retrofit options. But if you ever programmed an original RA system — a process that required you walking around to each device at least twice for every keypad button it responded to — then you knew there was room for improvement.
That improvement came in 2009 when Lutron introduced RadioRA 2, which not only greatly upped the number of devices that could be supported, but it had built-in IP control and moved to computer-based programming that literally shaved hours off a system rollout.
While Lutron steadily improved on RA2 — including adding the Connect Bridge to create a link between RA2 systems and the Cloud, as well as adding the lower-priced RA2 Select — at 12 years old, RA2 had lived a long lifecycle and was ready for a refresh.
In 2021, Lutron announced RadioRA 3, which features a completely new look and design to the lighting devices, as well as switching to Lutron Designer software (similar to HomeWorks systems) for programming.
On the shading side, Lutron introduced its first battery-powered cellular shade lineup at CEDIA Expo 2011, followed up by Sivoia QED roller shades, and then its Palladiom line in 2017. In 2021, Lutron launched Palladiom Wire-Free, bringing the cool, modern aesthetic to battery-powered shades.
Since I’ve been living with RA2 and original cell shades in my home for more than a decade, it seemed like the perfect time for a complete refresh of my lighting and shading system, giving me a chance to experience this latest generation from install to operation.
RadioRA 3
Unlike the switch from RA to RA2 — where no devices were compatible — RA3 supports many existing RA2 and even RA2 Select devices, meaning you could do a gradual takeover of an existing job without a wholesale replace. (Lutron has a full list of compatible devices on its website.)
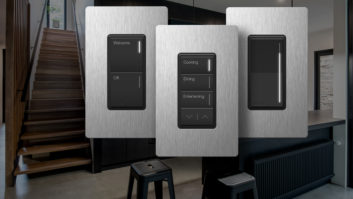
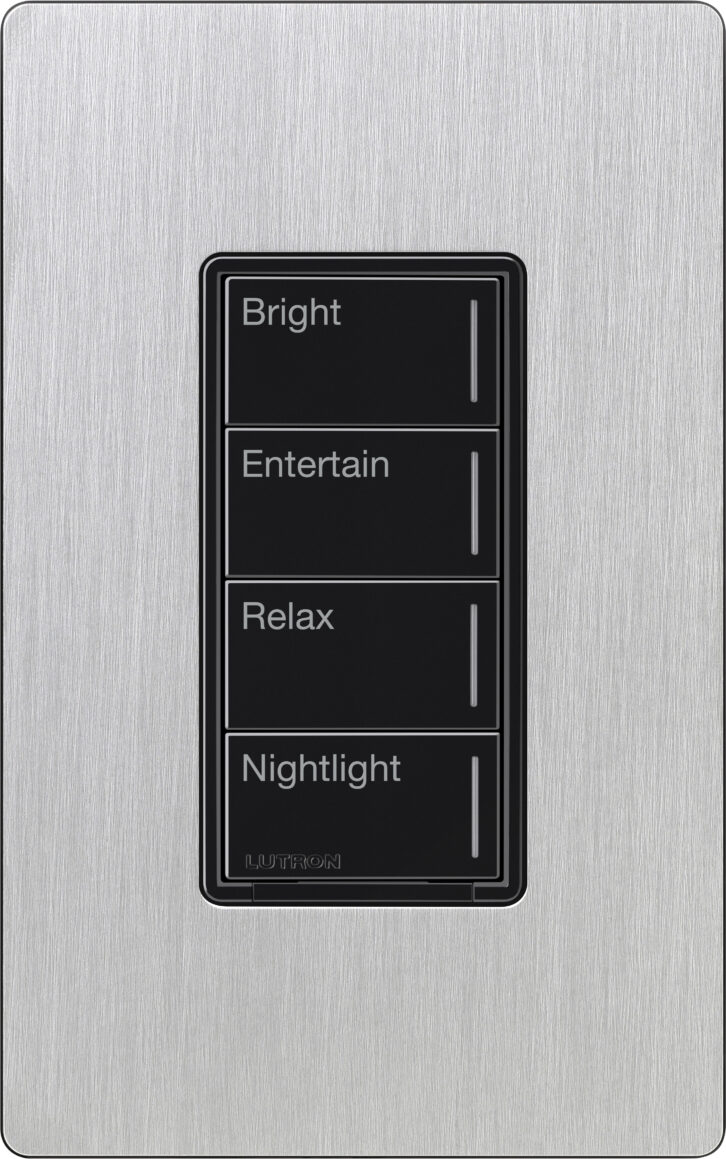
This is also good because there are some key devices currently “missing” from the RA3 lineup, such as fan speed controllers. Another big change is on the keypad front, as there are only three options available in RA3: two-button, three-button with raise/lower, and four-button. In my home, where every previous RA2 keypad was a six-button with raise/lower, this meant a pretty drastic button reduction, requiring some rethinking on the programming. (You can add an unlimited number of “virtual keypads” to the project, allowing app users to have access to as many seven-button keypads as they like.)
From my previous RA2 system, the only existing devices that wouldn’t work in the RA3 world were my old RA2 main repeater (replaced by the new RA3 processor), and my seeTemp HVAC controller (replaced by Lutron’s Wi-Fi thermostat). Even so, I did a pretty major 25-plus-device rip-and-replace, pulling out all but five RA3 devices, along with some old Control4 and Crestron Pyng lighting controls.
There are also some new “rules” regarding placement of devices. All RA3 lighting controls (technically “Sunnata RF”) use what Lutron calls “Clear Connect Type X,” with other Lutron devices (Maestro RF dimmers/switches/keypads, shades, occupancy sensors, Picos, etc.) using Clear Connect Type A.
Type A devices adhere to Lutron’s existing rules regarding placement of wireless devices, meaning they must be within 30 feet of the RA3 processor (or another repeater), and repeaters must be within 60 feet of the main processor or another repeater. (Though RA3 processors can communicate on the network, allowing for greater separation.)
New Type X devices communicate using a wireless mesh topology and have three specific installation rules of their own: all Type X devices should be located within 75 feet of the processor; at least two Type X (not including companion dimmers/switches) must be located within 25 feet of a RA3 processor; and each Type X device (not including companion dimmers/switches) must be located within 25 feet of two other Sunnata RF Devices.
In a standard install, this likely won’t pose any issue, and all devices in my 2200-square-foot home worked off a single, centrally located RA3 processor. However, if you’re doing a new install where you are planning on hiding switches away in closets, keep this in mind.
To accommodate larger homes and expand coverage, up to four RA3 processors can be used, along with up to eight RA3 repeaters. In total, a RA3 system can control up to 100 Type X and 100 Type A devices; however those numbers double when you add a second processor, making it powerful enough to handle all but the very largest projects.
And to cover any aesthetic needs, Sunnata devices are offered in four gloss and 20 satin finishes.
Lutron offers the main RA3 processor in two versions: either the RR-PROC3-KIT, which includes the processor, shelf mount adaptor, PoE injector, and cabling, or the RR-PROC3-CW, which includes the processor along with recess-mount adapter and junction box mount adapter. The RA3 processor requires a hardwired connection to the network and powers via PoE.
Palladiom
I’ve long said that motorized shades are some of the coolest things we sell — they are the one thing that never fails to impress visitors to my home — but when not in use, they don’t really look like anything special.
I mean, they don’t look bad, they just don’t look really any different than any other shade, and they are usually installed hidden away behind a valance or in a pocket.
The big news with Palladiom shades is their sleek, minimalist, and modern design aesthetic, and these shades are meant to be out on display. In fact, if you are planning on hiding these away, Palladiom is the wrong shade for the job.
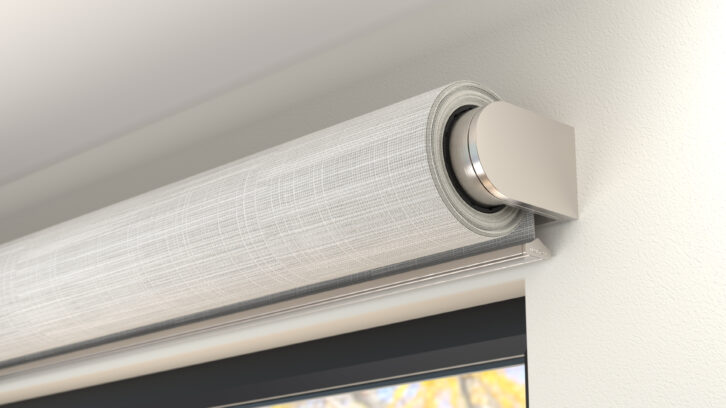
To complete and finish the modern look, Palladiom shades are offered with three different mounting brackets for wall, ceiling, or jam mount, with additional options for shade coupling. These mounting brackets are machined into an aluminum unibody structure that conceals the electronics and are offered in seven different finishes, including Pure White, Black Anodized, Clear Anodized, Satin Nickel, Brass, Satin Graphite, and Opal White.
Like Lutron’s other powered shades, you can specify which side the operator (where the batteries install) is located on, which can make battery changes easier in the future if any shades are going up against a wall.
These shades also run on Lutron’s patent-pending battery management architecture called Active Energy Optimization, said to extend battery life while using up to 60 percent fewer batteries than previous Lutron shades. And they maintain a claimed three-to-five-year battery life. Battery size is determined by shade width, with shades up to 24 inches wide taking three D-cells, up to 31 inches taking four, and up to 144 inches requiring six.
Lutron has also introduced an exclusive new Palladiom bottom rail option available in four finishes that is a streamlined hembar designed “to geometrically align with the shape of the bracket” and to be “an extremely minimal and elevated aesthetic.”
Palladiom shades are available in sizes up to 12 feet x 12 feet with a tube that is barely 2 inches in diameter, and is currently offered in 683 different fabrics.
One thing to note is that depending on the fabric you select, the back panel (facing toward the glass, not visible in the room) and the front panel (the part of the shade fabric you see when it is rolled down) can be different colors. On my blackout shades, we selected a white color, but when the shade is rolled up, you see the back, which is more a cream color. If there’s a designer on the project, make sure he or she is aware of this.
Install
Before you can even order RA3 or Palladiom devices, you’ll need to be certified, which requires completing some online training courses. It took several hours to complete the RA3 courses — followed by a lengthy final exam! — and about an hour to complete the Palladiom training.
As mentioned, the lighting portion of my install involved removing and replacing more than 25 devices, and any time I can complete a lighting install where I don’t shock myself and that all devices work in the end, it’s a victory!
I thought (wrongly as it turned out) that I’d just be able to remove my old RA2 devices and replace them device-for-device and wire-for-wire with the RA3 models, but that was not the case. And I definitely learned a lot about electrical wiring — specifically 4-way devices — on this install.
Remember that YouTube video about honey badger? “Honey badger don’t care; honey badger don’t give a sh–.” When it came to wiring, RA2 was a honey badger, and it was very forgiving. During my swap out, I discovered multiple RA2 devices that had been technically mis-wired or that had main dimmers randomly positioned between companions. You think honey badger cares about some mis-wiring? Nope. Those devices functioned perfectly for over a decade!
In contrast, RA3 devices are more like a drill sergeant demanding perfection at every turn. Please him, and he’ll reward you; get something wrong, and he’ll smack you with some PT. (Well, technically, it just won’t work.)
So, to save you some of the headaches I encountered, here are some of the rules you’ll need to follow when installing Sunnata RF devices:
- All dimmers, keypads, and switches require a neutral. Companion dimmers/switches don’t.
- In 3- or 4-way installs, the main dimmer/switch must be installed at the end of the wiring chain after all the companions, right before the load.
- Hybrid keypads cannot be part of a 3-way install and can’t control non-dimmable loads.
- Keypads (including hybrids) have wire leashes (instead of the screw terminals used by other devices) requiring wire nuts to connect to existing wires, making a multi-gang box install more of a challenge.
Fortunately, Lutron has provided a couple of tools to ease installation.
First is its always amazing tech support, which is truly available 24/7. This is how I discovered that hybrid keypads can’t work in a 3-way or control a non-dimmable load. A classic case of being told what I needed to know, but not what I wanted to hear. (And requiring me to order some different parts.)
Second is a fantastic error code built into the devices that tells you what you did wrong. The dimmers/companions have nine LEDs that will light in a sequence telling you what to fix. On my first wire-for-wire swap, it told me I needed to swap the black and brass wires on the main dimmer. Done and done! Then on my multiple 4-way swap outs, it told me one or more companion dimmers were on the load side of the main dimmer. From there I used a power-testing tool to find the incoming hot wire from the panel and I used a toner to trace/identify wires running from box-to-box until I found the end of the chain.
The actual device install is pretty standard, with screw terminals that can accept up to 12/14-gauge wire and holes for direct-connecting 14-gauge wire. These holes were super handy for looping neutral and hot wires to devices, letting me save space in three and four gang boxes. The devices also have a solid metal plate that lets you put a lot of pressure to get them to push back into a box to fight against the stiff electrical wire.
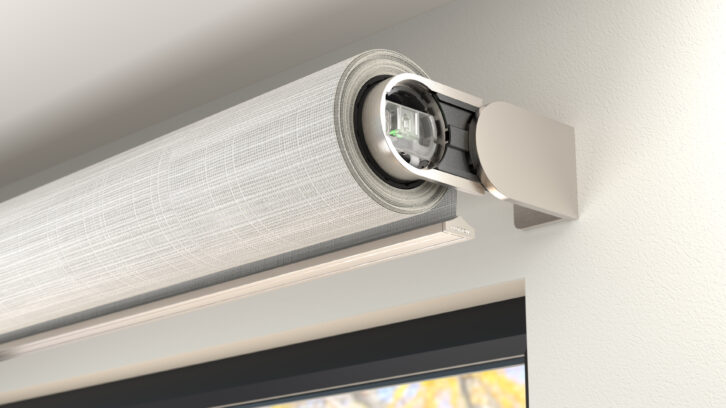
There’s really nothing too unusual about installing the Palladiom shade brackets. Just get your measurements correct, make sure the brackets are level, and secure them to the wall/ceiling. Once done, the non-operator side seats into the bracket while the operator side slides and clicks into place. The nice thing about this design is that it makes it easy to partially remove the shade for battery changes without having to take the whole thing down. Plus, it is just so sleek and cool looking.
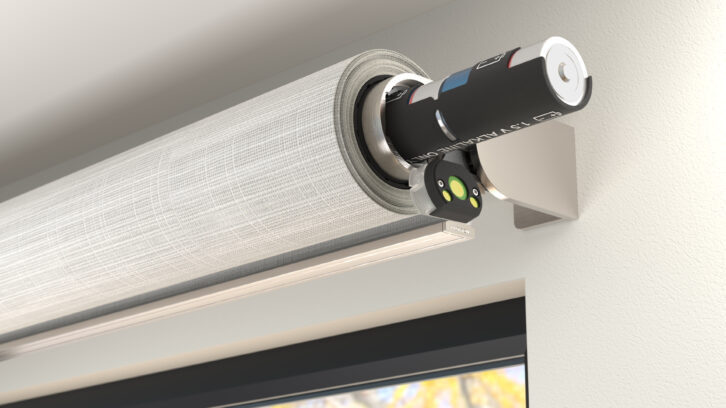
My one complaint is that the battery compartment/cable connection is kind of flimsy feeling, held on by just a short and thin ribbon cable. I made the STUPID mistake of pulling on this on my first shade, thinking that is how you slide out the battery carriage — even though a warning in the instructions clearly says NOT to do this — and the plug popped off in my hand, thus bricking a brand new $2400 shade! (To Lutron’s credit, they sent a new drive unit along with a call tag for the damaged drive, giving me a chance to experience an in-field shade replacement.) Even after knowing not to do this, on trying to remove a battery carriage from another shade, the connector got hung up on it and I started pulling it. But the takeaway here is: Take care when messing with that ribbon cable and/or the battery tray. Also, if your customers will be doing the battery changes, maybe show them the correct way to do it.
Programming
Lutron offers a way to convert existing RA2 projects over to RA3, but since I was removing virtually all the old devices, I decided to just start from scratch, factory-defaulting the old RA2 devices to add to the new processor.
I’d actually done a few RA3 installs for customers, so this wasn’t my first go-round with the Lutron Designer software, and if you have any experience programming RA2, this is a pretty easy transition, and if you do HomeWorks you’ll be right at home.
In a nutshell, you create the project where you define the name and location, enable Cloud Remote Services, and set a default color of devices, etc. From there you move onto the project, where there are five tabs: Design, Program, Activate, Transfer, and Diagnostics.
Design is where you add rooms to the project, then add Controls (dimmers, keypads, switches, sensors, repeaters), Shades, and Equipment (processor or car visor receiver) into each room. There is a new toolbox feature at the top where you can keep frequently used items, making it a bit quicker to populate the project.
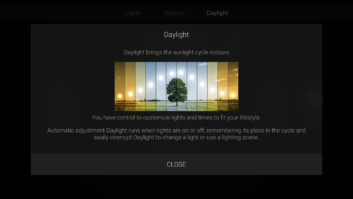
Program is where you’ll add customization to devices (keypads), set timeclocks, program occupancy or vacancy settings, and use Natural Light Optimization to automate tilt blinds throughout the day to either fight fade, allow view, or privacy. You can also define shared scenes, shade presets, and configure vacation mode. All programming is straight-forward, fast, and simple.
My only nit on the programming side is that it’s a bit of a bummer that Lutron has reserved any kind of “variable” programming for HomeWorks. There is no time-of-day programming for button presses — say, to turn on a bathroom light to full bright during the day, but to 50 percent at night — or double-tap or push/hold programming. If you want these kinds of variables, then you’re going to have to step up to HomeWorks town.
Finally, you’ll Activate the devices and then Transfer the program to the processor. While all Type A devices activate via the Lutron Designer software as usual — put the processor into activation mode, then go press/hold the button on the device and click “activate” — all of the Type X (Sunnata RF) devices activate using the Lutron Connect app on your phone.
You press/hold a button on the device to activate and then in the app select which device you activated by room. I’m not sure it’s any faster, but it is nice to walk around the house with your phone and activate things instead of toting a laptop, similar to using Control4’s Composer Express.
Diagnostics offers a host of tools for troubleshooting any issues in the system or for checking activity that can be filtered down to specific days/times. There’s also tons of reports and tools for setting shade limits and Intelligent Hembar Alignment, or fine-tuning the high and low trims on each load, or the light level of devices, or setting the phase of each dimmer (which come as Reverse Phase by default).
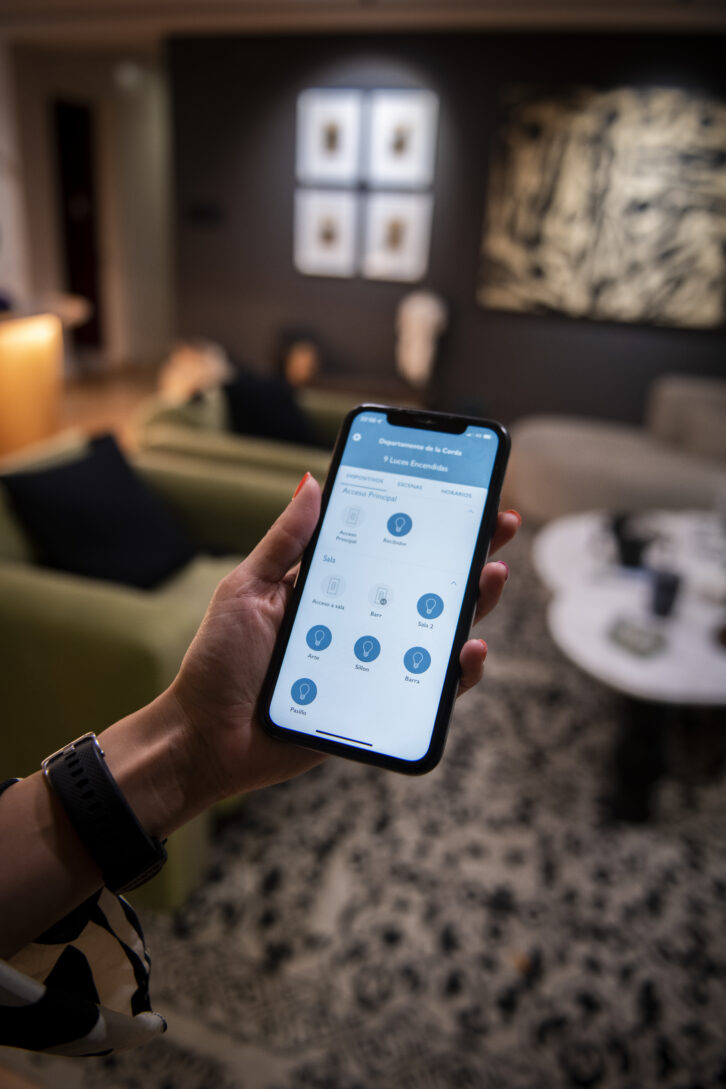
While homeowners have access to quite a bit of program tweaking within the app — such as creating timeclock events for lights and shades — there are some limits to what they can do. For one, while they can edit an existing scene, they can’t create a new one. Also, while they can create scheduled events, they can’t select a scene to be triggered during an event or set shades to a specific level besides one of the defined presets or make changes to a timeclock event created in programming.
Fortunately, with remote services available, it is possible for the dealer to go in and make tweaks, updates, and changes to the programming, saving you on truck rolls.
The RA3 process also supports Lutron’s LEAP API Integration, allowing third-party systems to communicate in a more secure and dynamic way. This makes integration super-fast, easy, and reliable, and it took just a few moments to pull all the devices into my Control4 project. Beyond C4, Lutron also supports Alarm.com, AMX, Google, Alexa, Apple HomeKit, Crestron, ELAN, Josh.ai, Kaleidescape, RTI, Sonos, URC, Ring, and Savant.
Performance
Not surprisingly, the system performed flawlessly, and the only adjustments needed were to my programming as I decided how I wanted the system to function.
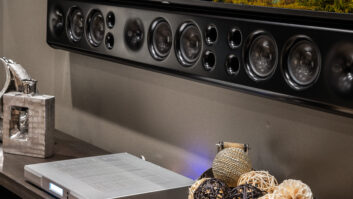
Beyond being beautiful to look at, the new Palladiom shades are astonishingly quiet. Lutron claims they are down to 35 dBA, but even when in the same room with them and watching them move, I am unable to hear anything at my seating position. They are whisper-quiet and just move like magic.
While you never really think about your interaction with a light switch/dimmer, the Sunnata devices are just a pleasure to use. Normally, a lighting control has a kind of push-and-click feel to it or has that press/hold rocker bar for dimming. It’s fine and it works, but from a tactile experience, it really isn’t great.
But after swapping out a host of other devices — including Crestron, Control4, and Lutron RA2 — with Sunnata, I really noticed the luxe feel of these new devices. The press is smooth, with just the right amount of travel and zero click. Even on the switches, there isn’t a click. It’s just a little reminder every time you use them that they are a quality product.
Visually, the new Sunnata devices look very modern and are a leap in aesthetics from the old RA2 styling. Unfortunately, this makes the lack of some things — like fan controllers — a bummer, as they now look and function differently.
A big part of the styling change are the nine LED lightbars on the side that are so much more elegant and attractive than the old click up/down method. The light bar is also touch-sensitive; touch at the top to turn it to full bright, touch at bottom to fade to off, slide anywhere along the lightbar to dim. Companions are now visually identical to main devices, delivering a consistent look and operation throughout. (Standalone, non-RF Sunnata devices are available for a uniform aesthetic at a reasonable cost where system control isn’t needed.)
What some might find limiting are the new keypad configurations. If you want dimming from a keypad, you are limited to just three buttons. (You can’t program a keypad button to raise/lower lighting levels.) Of course, you can use older RA3 See Touch keypads, but these don’t have the same look, and frankly look dated compared to the clean, modern styling of the Sunnata keypads. For what it’s worth, I ordered four-button keypads (without dimming) throughout, and wish that I’d gone with the three-button with raise/lower.
While Lutron lighting and shading systems have always been found in the most luxurious environments, Lutron has taken already great products and made them even better. By focusing on style, design, and aesthetic improvements, Sunnata and Palladiom raise an already high bar and are a terrific addition to the company’s offerings.
888-588-7661; LUTRON.COM
Product Specs:
- RA3 processor supports up to 200 devices (100 Type A, 100 Type X); two processor systems support up to 400 devices (200 Type A, 200 Type X)
- Up to four processors and eight RA3 repeaters supported
- Sunnata RF dimmers support LED, CFL, Incandescent, Halogen, ELV, and MLV loads
- Hybrid and traditional keypads available in 2-, 3-button with raise/lower, and 4-button configurations
- Available in four gloss and 20 satin finishes
- RA3 processor powers via PoE
- LEAP API interfaces with Alarm.com, AMX, Google, Alexa, Apple HomeKit, Crestron, Elan, Josh, Kaleidescape, RTI, Sonos, URC, Ring, and Savant
- Programs via Lutron Designer software
- Palladiom Wire Free shades available in sizes up to 12 x 12 feet and 683 fabric options