As much as we would like it to be, not every job is a new construction, 10,000-sq.-ft. mansion. One thing that has been a huge boost to our business has been takeovers. Crestron Home has made the takeover a much more feasible, profitable, and successful part of our business. We can get in and out, and give the homeowner a better experience with updated electronics and interfaces than they ever thought they could have.
Through some significant trial and error, and a lot of planning, we have come up with the five key steps to ensure our takeovers go smoothly and our clients are happier with their new home automation system.
1. Conduct the Initial Walkthrough
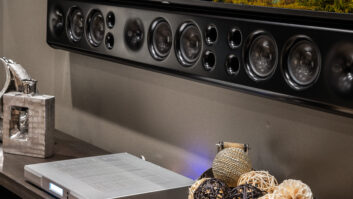
This is the time to understand the layout of the home and of the system. You should take time to catalog all of the hardware in place; take pictures of all of the connections and hardware — front and back if possible; understand the wiring infrastructure (how many category cables and what type to each TV or other locations); note how is the rack laid out; and examine the network and control topology. Also, you should use the system with the client. Have them turn on the system and use it as they normally would. How do they control AV devices? What do they use for lighting and shading control? What control methods are employed (IR, IP, Relays, Serial/RS232)? Do a Wi-Spy site survey to understand the RF environment. This is your one chance to be in the home. Even if you can come back, you don’t want to — that is more unbillable time. You want to present as accurate a proposal as possible, and you can’t do that without a good inventory and accounting of what is currently in place and how it works.
Most importantly, spend time with the customer to understand their needs. Find out what they like about the existing system. What features do they use the most? What are their pain points? What do they wish it could do but doesn’t? These are all critical questions to consider during system design. I will also get budgetary information from the client. Typically, if this is a takeover, they understand the scope of the budget since they’ve been through this at least once before. If they are not, and need some help, I will give very broad budget ranges to help them understand the scope and scale, so they are not surprised by the final number. I may tell them the final cost will be $40,000–$60,000 — a big range, but it usually keeps me from underestimating. I also try to have broad ranges for each subsystem — I can tell them a network will be $5k-10k, shading is $2k per window, a surround sound system with universal remote is $8-15k, or a front projection system is $15-50k. All these numbers help them get their heads around the expense. The numbers may be different for your business and your market, but have these numbers handy. Go through old proposals to see if you can figure out a range. Or put together a few dummy proposals for each subsystem to familiarize yourself with the numbers.
2. Perform System Review and Design
Review any system documentation the homeowner has, including user manuals from the original integrator, programming code, CAD drawings, wiring diagrams, hardware model numbers (in case you missed something or couldn’t’ get it on your site visit), and network infrastructure. Most importantly, understand what they have and what can Crestron Home do. We need to make sure any legacy hardware we are keeping can be controlled by Crestron Home. Review your design ideas with Crestron Sales Support Services. Have them put together a design based on the system you designed. It is a great gut check, plus it’s free. If the two systems are similar, you’re in good shape. If there are major differences, that is OK, but have a discussion with them about why and assess performance/usage and budgetary impacts. It also offers the opportunity to see if there are new features to Crestron Home that you’re not aware of. New features and devices are constantly added; sometimes it’s hard to keep up. That can be huge time and cost saver.
3. Review Design with Customer
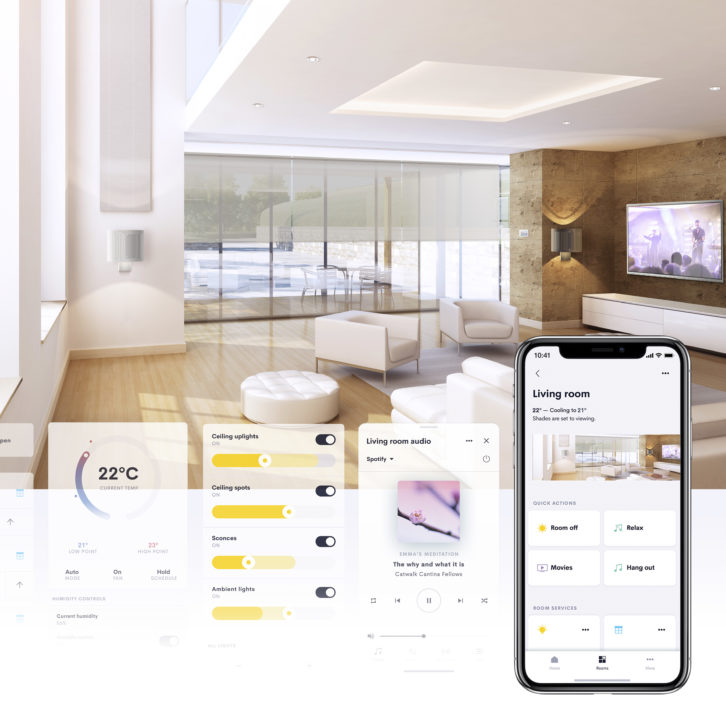
Spend time with the customer to go over your findings and your plans. Based on what you were told during the site meeting, you have designed a system that meets needs x, y, and z; eliminates pain points a, b, c; and adds functionality 1, 2, and 3. Go over the system operation and how things will work. At this point, have the client download the Crestron Home app to their phone and have them launch demo mode. Walk them through some basic navigation and give them some homework. I ask them to play around with the demo app and tell them I will call back in a day or so to get their feedback. This exercise helps them to understand how the system will work when we review the proposal rather than that conversation being vague and theoretical. I call to confirm that they’ve completed their homework. I will not review the proposal with them until they do. This is an investment on their part, but nothing compared to the investment we will all make if we move forward together. We need to ensure our investments pay off; that the client gets the experience they really want.
Related: 5 Ways to Be the Client’s Favorite Trade on the Job
4. Review the Proposal
This is something that should be done in person. That can’t always happen, but that should be the norm. At this point, present the proposal without pricing, and go over the subsystems. Explicitly tell them what is and is not included. Talk about the experience and day-to-day usage. When you finally put the numbers in front of them, they are ready sold. I usually don’t get any pushback. I will also put together some optional upgrades and additional subsystems. Several times clients have said “no” to lighting in the walkthrough, but once they have played with the app a bit and we’ve built a rapport, they are more amenable to it. Having the options and pricing ready makes the sale much easier.
5. Do What You Said You Would Do
Deliver a system that meets the client’s expectations at the pricing you laid out.
Remember, we are designing the system and experience for the client. They may have different usage needs or desires than you do. They may not understand press-and-hold or double taps. They may not want one keypad with several small buttons, but rather a few more keypads with larger buttons. Do what is right for the client and not what is most profitable for you. You will not only have a happy client, but also an advocate who will provide great referrals. We are probably the one trade they will have a long-term relationship with. You want to make sure they have positive memories of the process and the end experience.